
We can use this principle from the wonderful world of animation and apply it to the web interfaces we’re building to achieve some really amazing effects!
The Parts
In the context of code, an interpolation is made up of a couple of parts. To achieve a sweet animated interpolation, we have to familiarize with these parts (it’s not too hard, I promise!)
- InputValue – The initial (or current) value
- InputRange – A range for the input value
- OutputRange – A range for the output (transformed) value
Right, I know the above doesn’t explain much, but it’s important to remember these terms. Let’s go with an example.
Let’s pretend, we want to transition the background color from red to blue, based on how much the user has scrolled. We only want this effect to apply from the top to about 200px down the page (Fancy, right?!).
The amount scrolled would be the InputValue. The top of the page (0px) to where we want it to end (200px) would be the InputRange. Lastly, the red and blue values would be our OutputRange.
These values can be visualized like so:
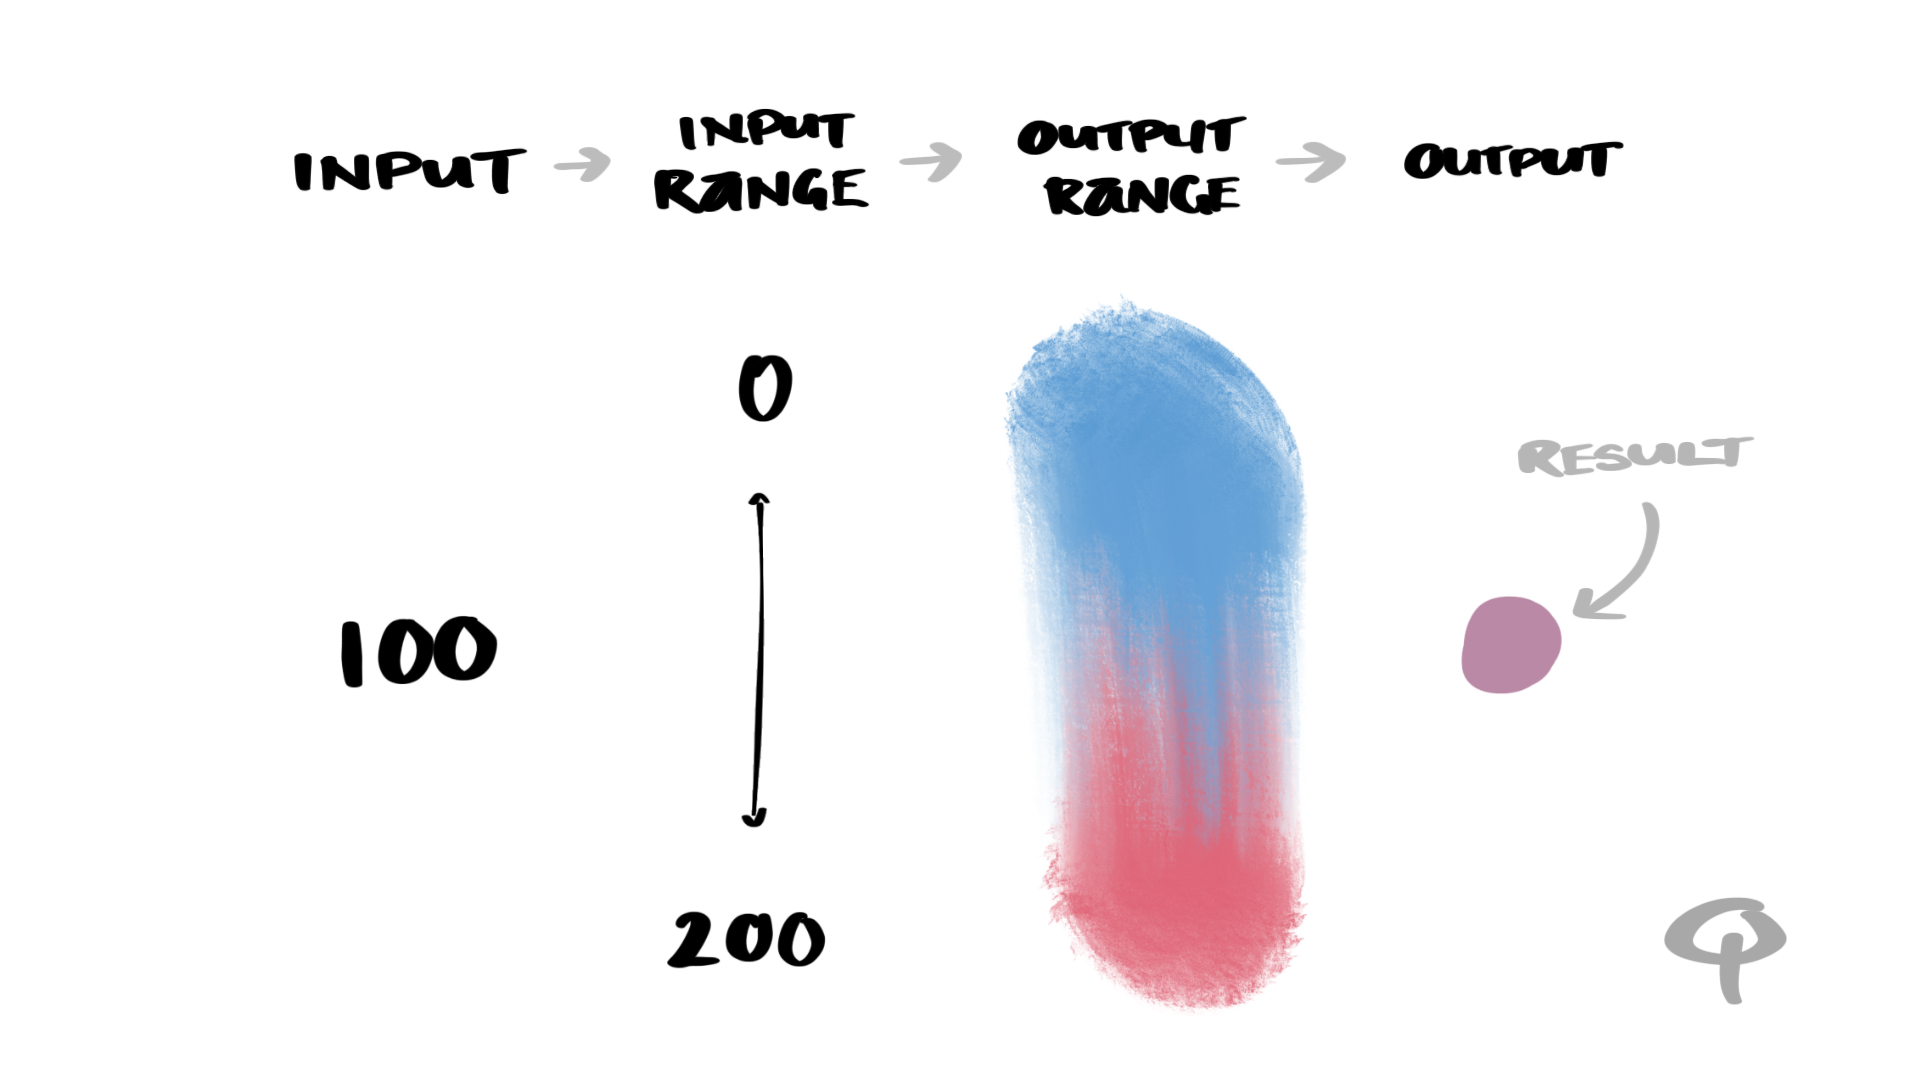
If the user has scrolled 100px, based on our [0, 200] range, the resulting color should be a mixture of red and blue.
That’s it! That’s animation interpolation!
Examples
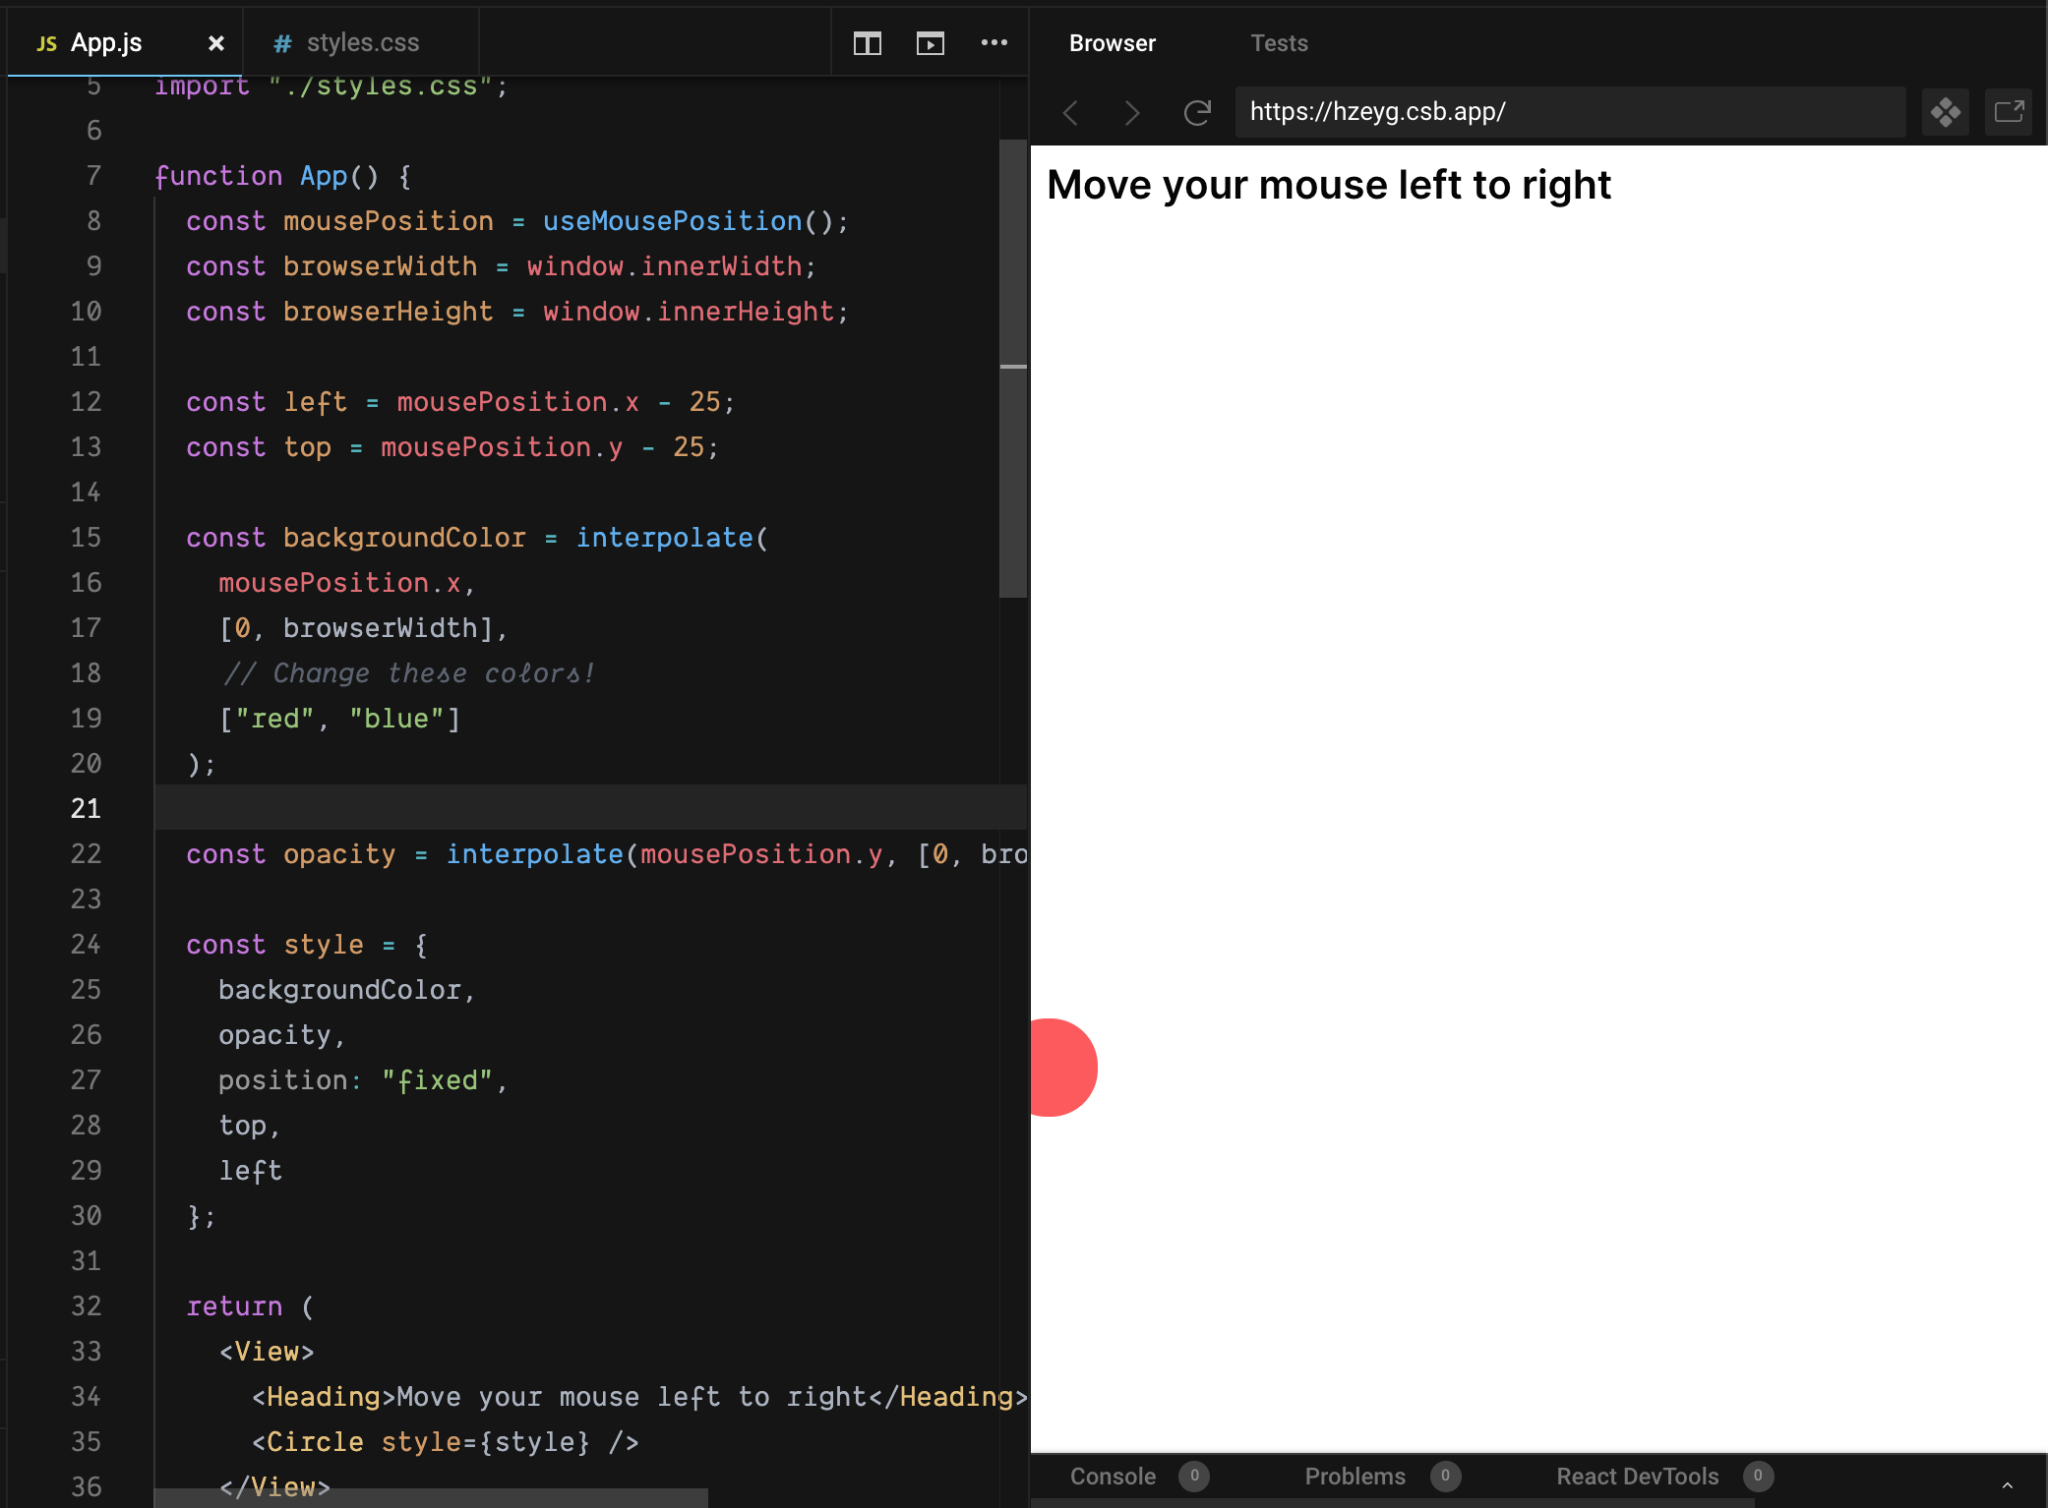
Let’s take our above example of transitioning between red to blue (OutputRange) based on where we position our mouse (Input). If our mouse is on the leftest side of the screen, it should be pure red. If our mouse is the rightest side of the screen, it should be pure blue (InputRange). The interpolation function will MATH out the rest, giving us a slick and smooth color transitioning effect:

Color transitioning circles are neat. But how’s about a more… practical?… example.
An interaction that’s become common in the world of mobile is to smoothly transition text or images as the user scrolls. We can apply the same interpolation technique to achieve just that!
In the above example, the (Cover) image grows and fades as the user scrolls. The Title text also grows the further down the user scrolls.
Mobile apps use this technique all the time. Now you know how your favourite apps achieve liquid smooth, hyper slick, and super responsive interactions.
Give it a go
I’ve created a CodeSandbox where you can play around with the red/blue ball. Under the code comment “Change these colors”, add your own colors to see how you can make the ball magically transition as you move your mouse!
Click here to check out the CodeSandbox
If you’re interested in seeing how the (gasp) MATH works under the hood, feel free to peek at the source code. Otherwise, just use the interpolate() function from @wp-g2/utils and start making things move!
P.S. If you just wanted a no-frills, dependency-free version of the interpolate() function code for your project, I’ve prepared a gist for that.
Originally posted on the G2 Components project blog.